

Custom Bathroom Vanity
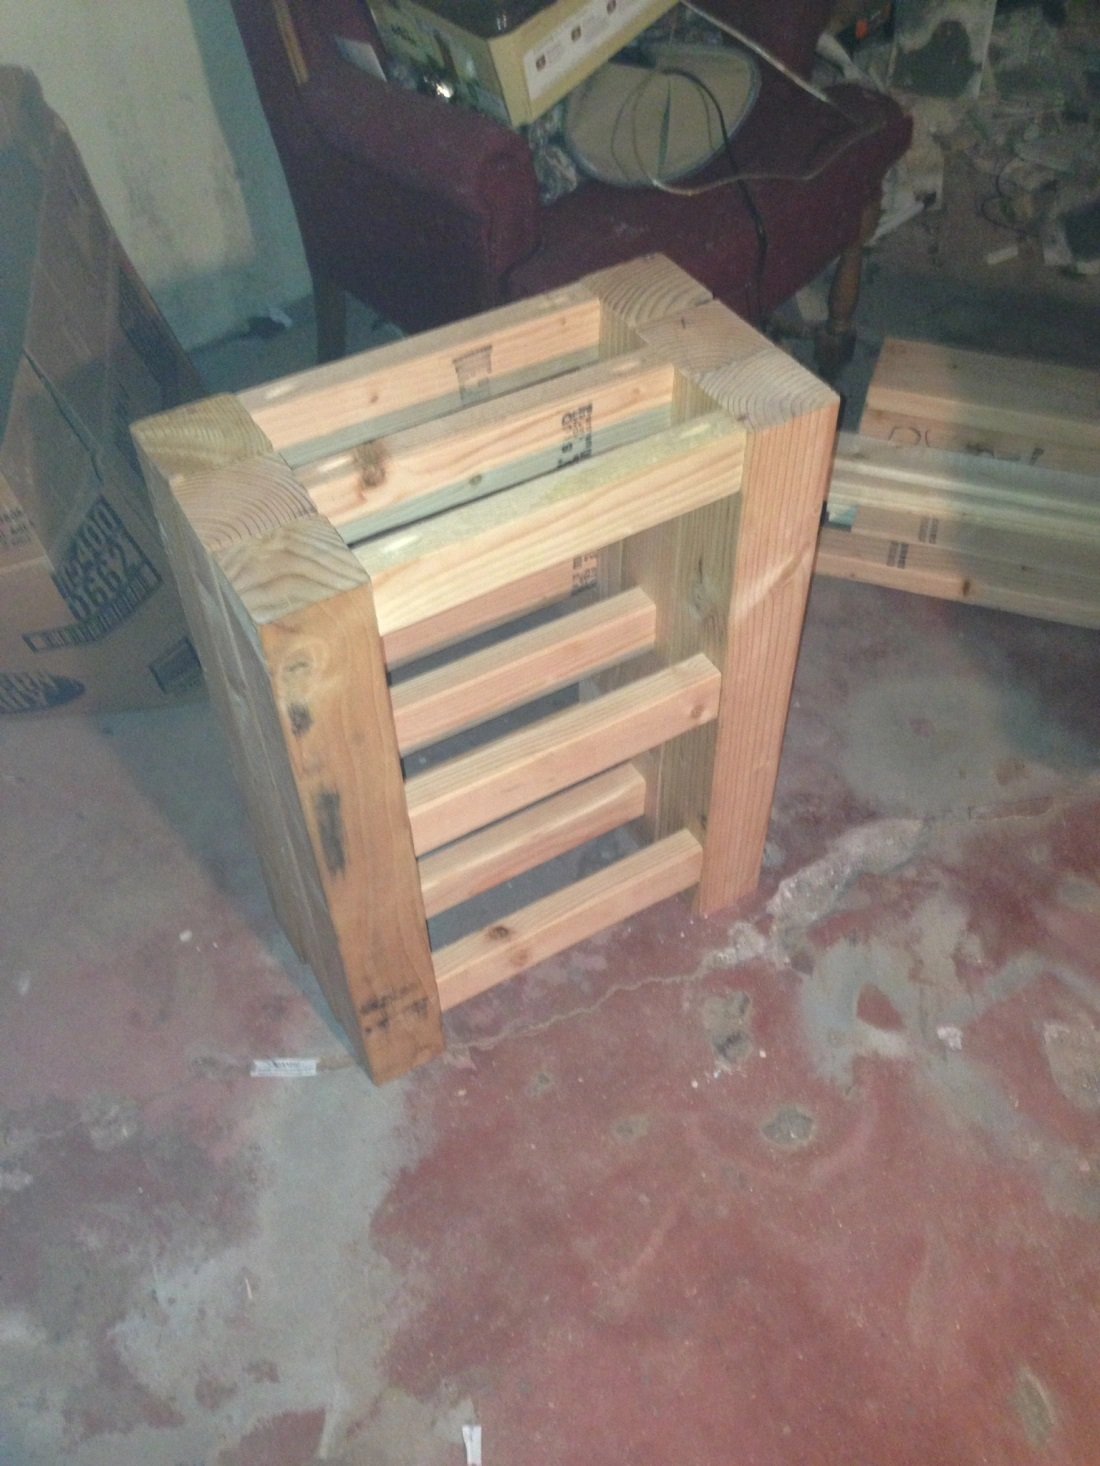
To help save costs with our bathroom remodel we wanted to build the vanity from scratch after looking around at lots of different options. We used 4 X 4 and 2 X 4 pieces of wood, and made the 2 X 4’s more like 2 X 3’s by shaving them off on a table saw. It will have a cement top, so it needs to be very sturdy. Using a Kreg jig to attach each cross piece; 4 screws each plus wood glue on all contact points. Notice that we didn’t bother to mill off or sand any of the markings on this wood; this is because we are going to beat it up with chains and hammers before staining it. We are going for that RH/reclaimed look with this piece. We added the first two cross beams in the same fashion.
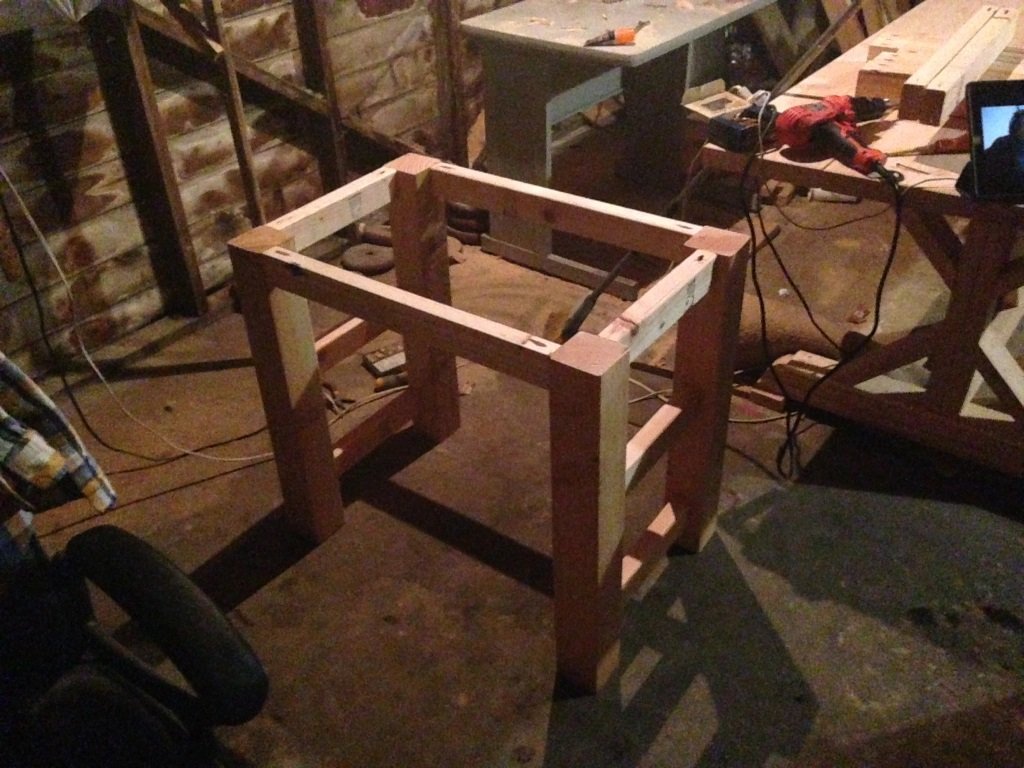
Here are the second two, with all three leg bases attached together now.

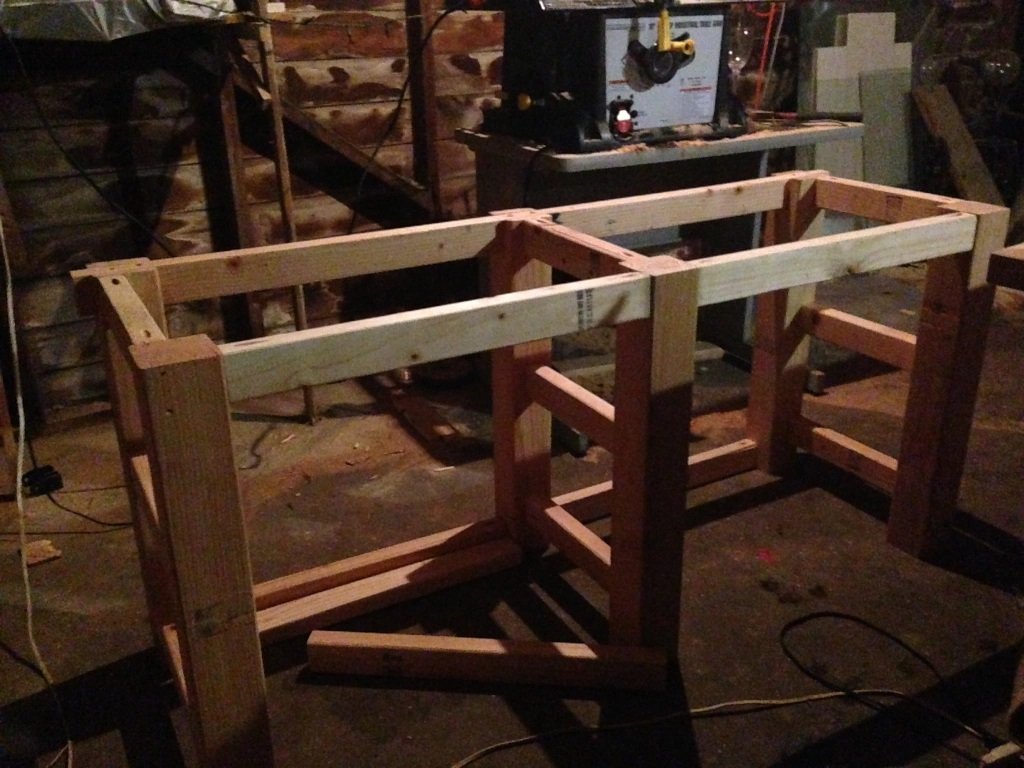
…and the whole basic structure now. We still need to add in the shelf slats.

Before moving any further on this, we wanted to place it where it will go and make sure it’s a good fit for the space. The shelf slats are just set in place to see what the baskets will look like, and we’ve got cardboard on top and some mixing bowls to get the whole perspective.

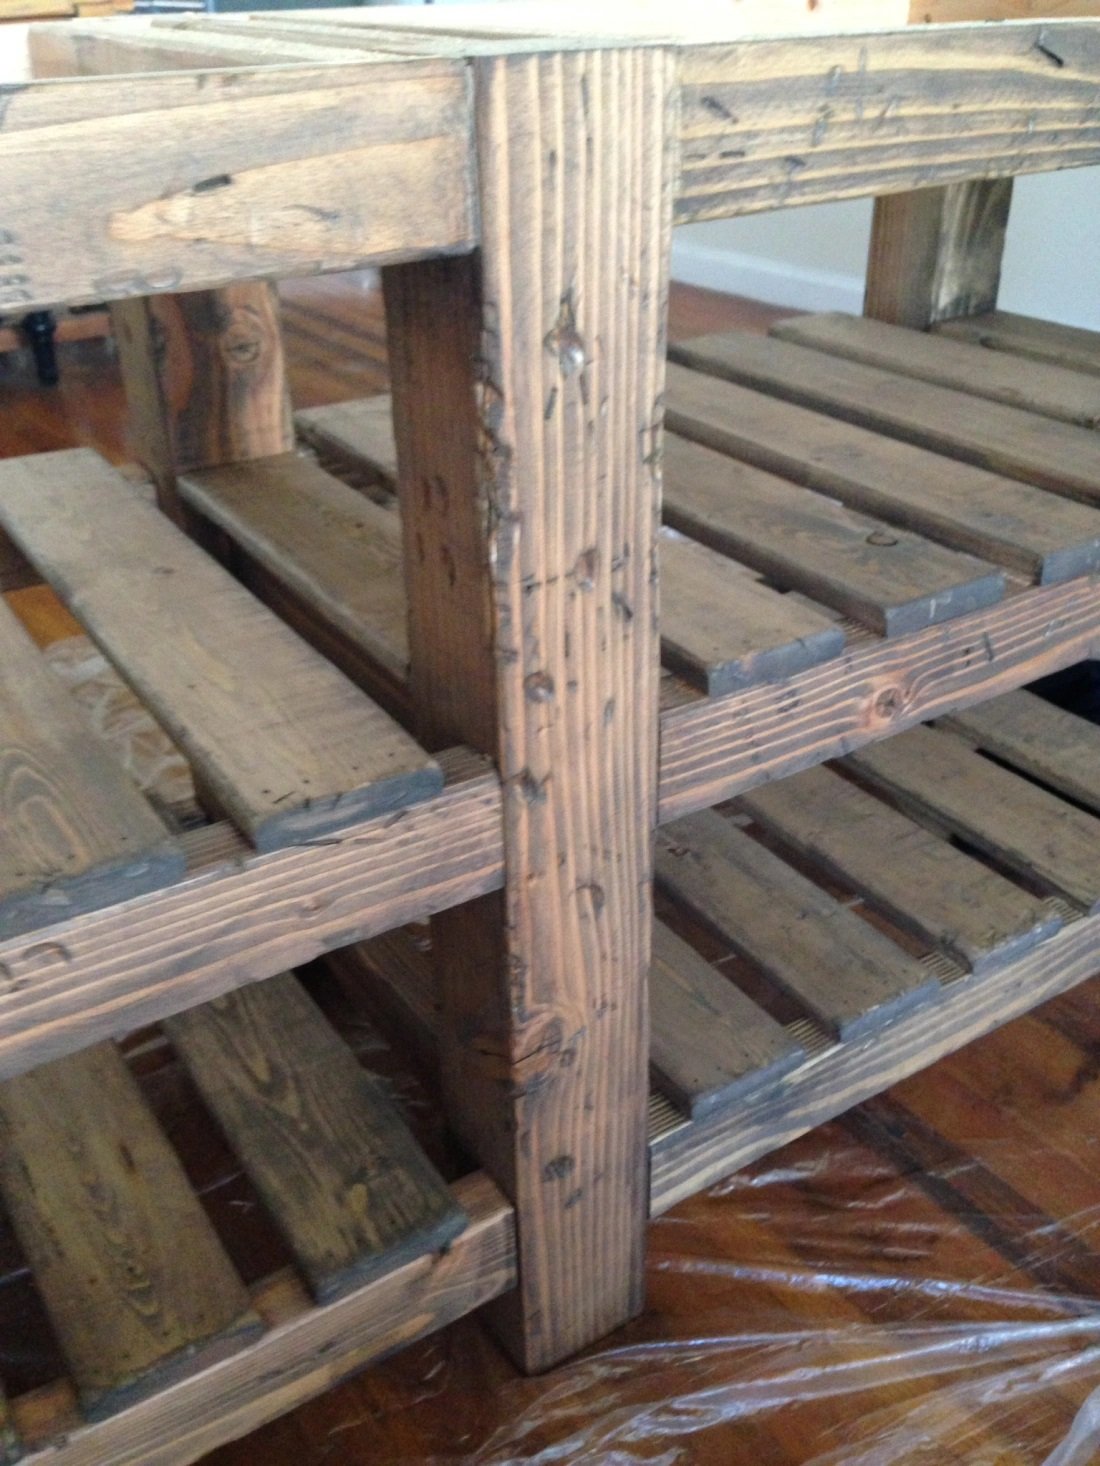
We’ve added four more front-to-back supports on the top (which will be hidden) for strength, even though the 4 X 4 posts will bear the brunt of the cement weight. All of the shelf slats are now fixed in place too. For this we just used wood glue for all of the joined surfaces and shot four finish nails through each contact point. Again, this would not be the method we would use if we weren’t trying to make this look like something we found in a barn somewhere. We beat it up a little with hammers, wood scraps, and a chain and then stained it with a custom mix of stain.
Now we’re going to pour our cement vanity top. We’ve never really done any of this. Let’s see how this works out!
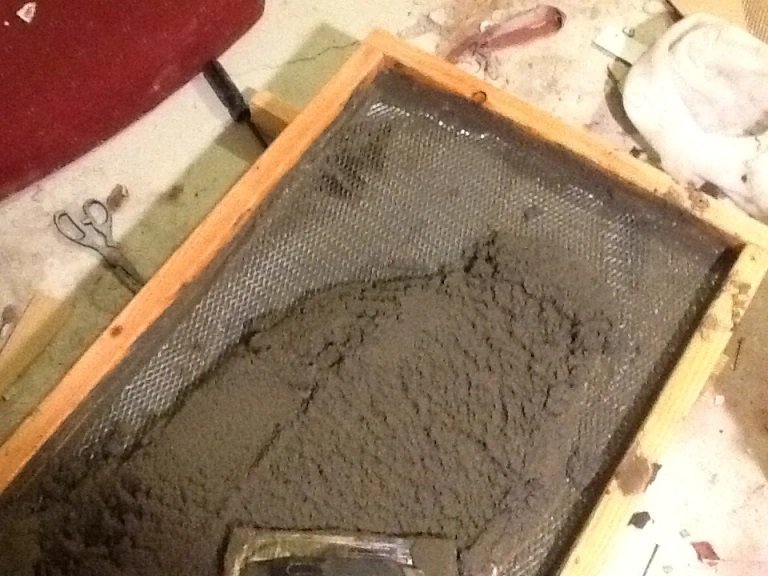
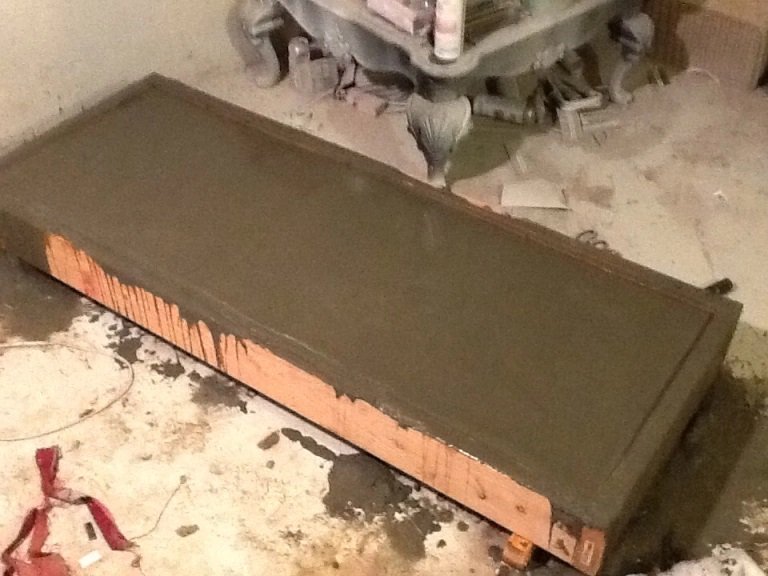
We started by making a form out of 2 X 6 lumber to the specs we need. We put in several braces up underneath it to hold all of the weight until it dries, then used plywood to make a solid bottom for the cement to lay on. Before starting with the cement, we rubbed a paraffin wax block around all of the cement contact points so that hopefully it will release smoothly when it’s dried up. We poured in about 3/4″ of cement, then laid out sheet metal to reinforce it, then poured in another 1″ or so of cement. We packed it down tightly with my grout float, making sure there were no voids or bubbles. We smoothed it out a bit, but left some texture to it since wanted the surface to be rough, but not too rough. We then went around and rounded the edges for a slight taper. We waited until the cement was still wet, but dry enough to hold a form. We waited about an hour before doing this step. About 48 hours later we removed it from the mold. Now the real task was hauling it back upstairs into the bathroom!

We had to immediately put the sinks and faucets on top to check out what it will look like.
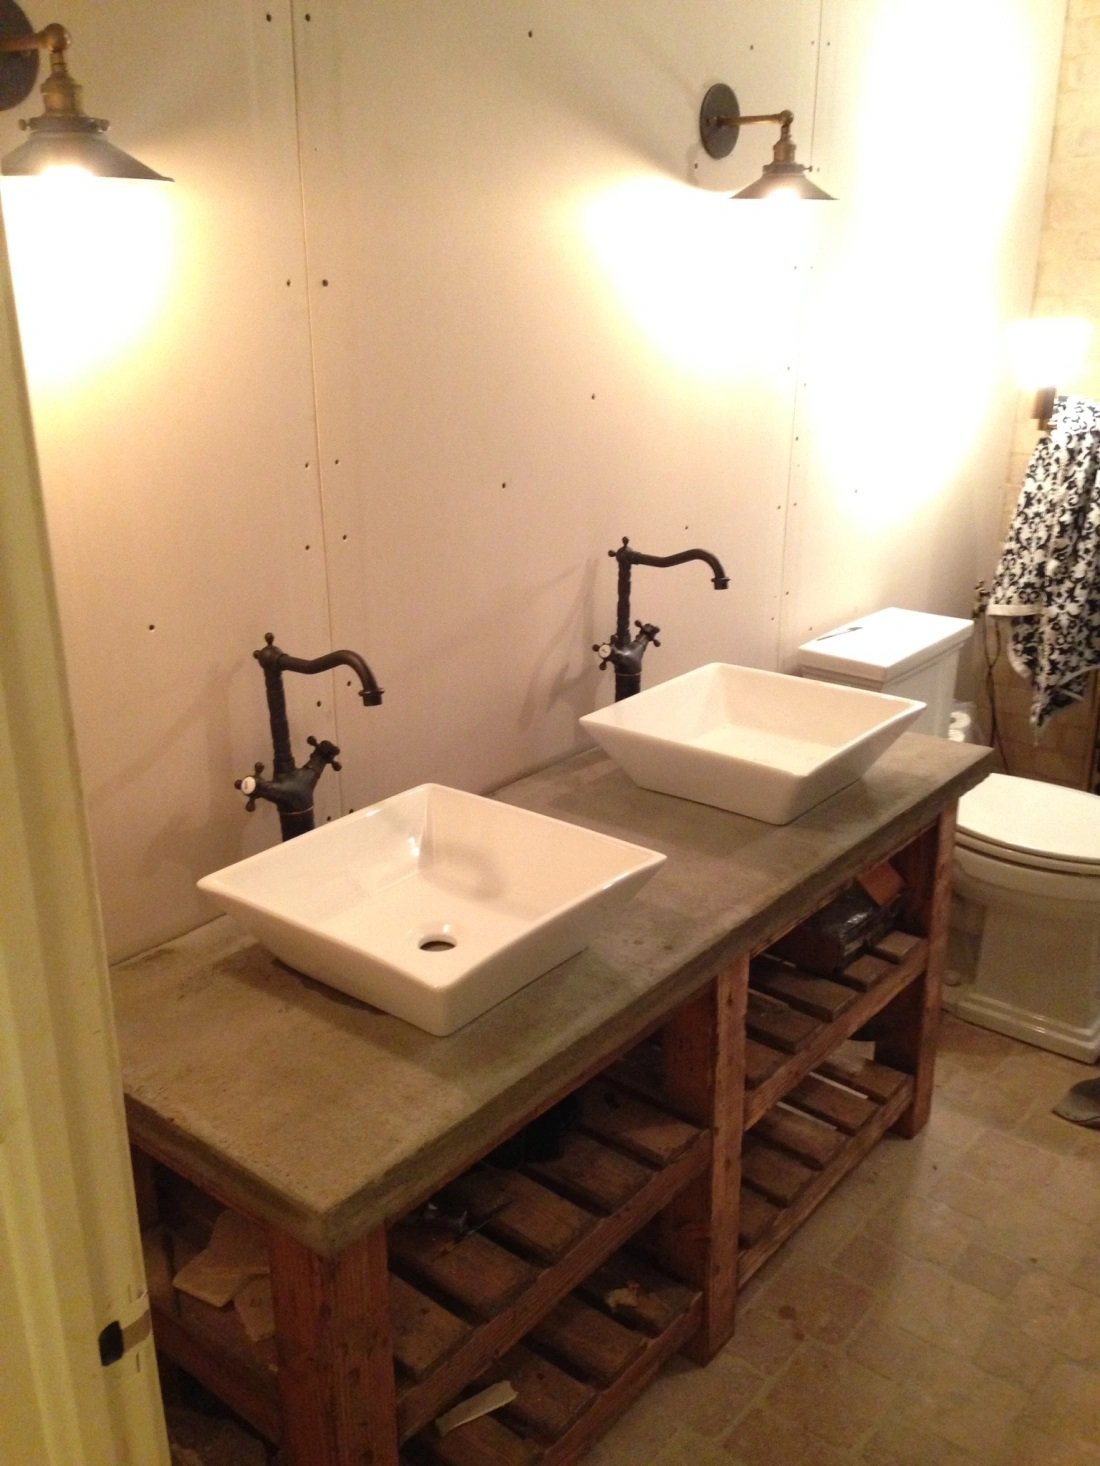
And here’s the finished product. We love how it turned out! We added baskets to store bathroom necessities and left the bottom open for extra towels. We sealed the top with a concrete sealer for added durability but other than that, we left it in it’s raw form.
